Tracking logs and errors in a software product is very essential for reliability and maintainability. Kafka is one of the most powerful solution for collecting/storing logs and activities. Use cases can be seen in this blog.
In this post, we will use Upstash Kafka to collect errors and logs occurred while users are using the mobile application which is built by React Native. Once the logs are stored in Kafka, there are endless possibilities how to consume them and integrate to log analysis tools.
Using Upstash Kafka
Upstash provides serverless Kafka with HTTP connection. Here is the documentation of Upstash Kafka.
The advantages of Upstash Kafka:
-
Price scales to zero
-
Free tier
-
Fully managed
-
REST API for connecting Kafka
-
Very simple and fast configuration
To use Upstash Kafka, first thing to do is login and connect to console . As the second step, we need a Kafka cluster to use.
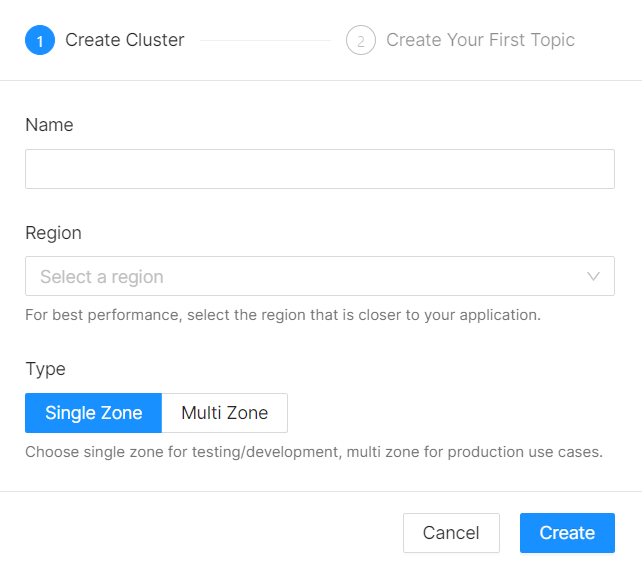
Name your Kafka cluster, select the region where the cluster will be stored, click the create button, Kafka cluster is ready!
On the second page of the setup, first topic is requested. We can pass this step and create topics later.

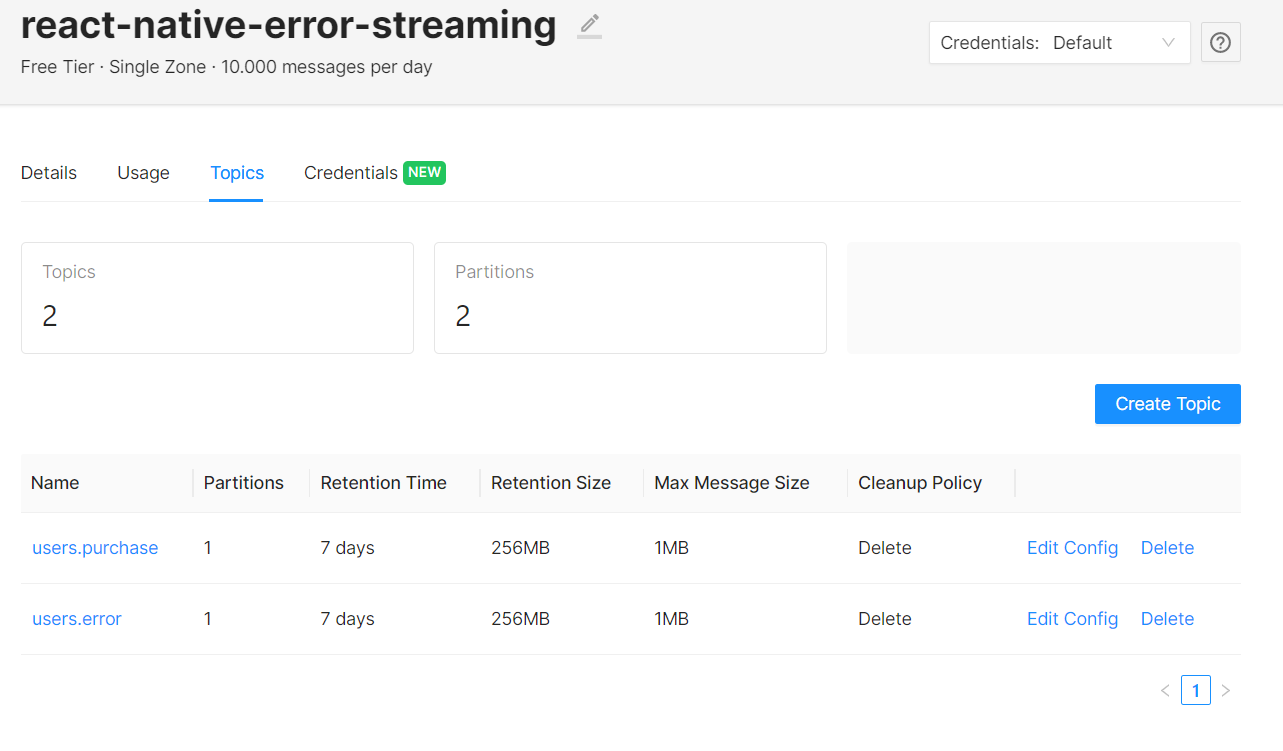
Inside the cluster, Upstash provides “Topics” and “Credentials” sections to configure our cluster.
We can create our topics under the “Topics” tab. We can configure its settings while creating it as below.
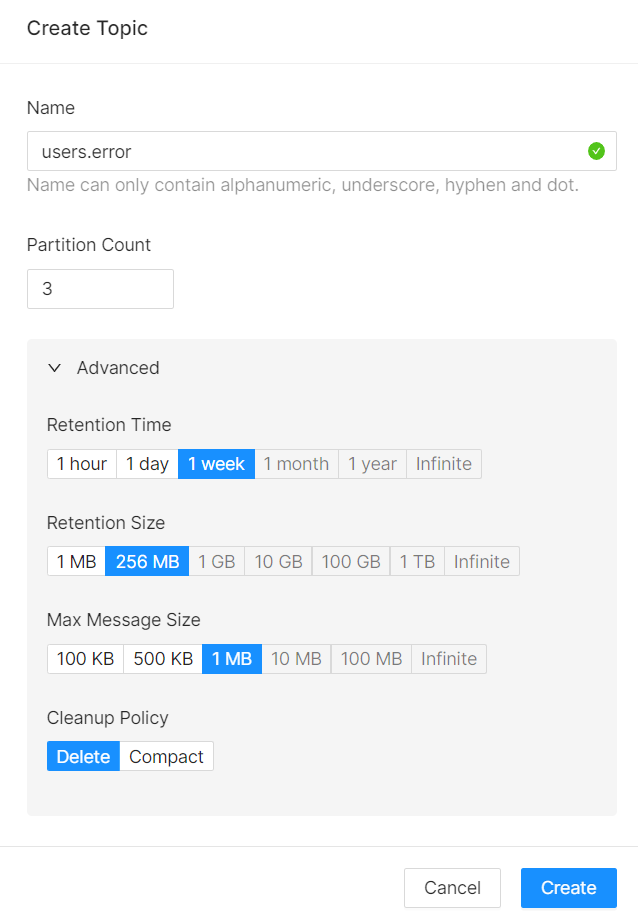
In this blog, we will work with two different topics. First one is the topic which will contain our error messages. Those error messages will come from mobile app when failures happen. We will name this topic “users.error”. The second topic is “users.purchase”. We will collect the log, which will occur when a user purchases an item from our simple mobile app. To keep our demonstration simple, I created these topics without changing default configurations.
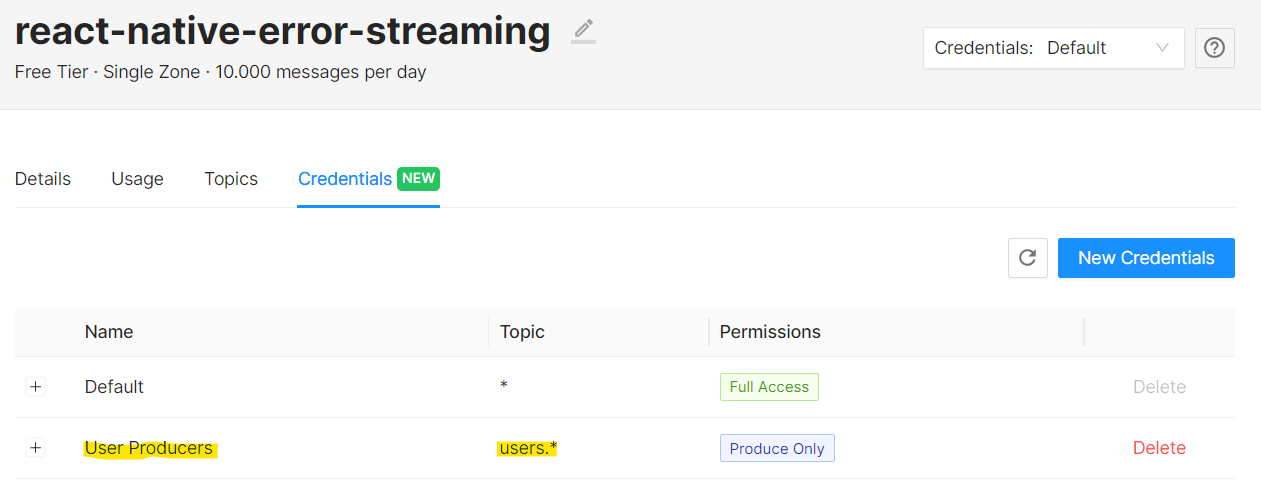
Lastly, we can create new credentials under “Credentials” tab. Since our users will be the producers of logs and errors, we need to create new credentials for “produce only” purpose and permit their access for only the topics with the prefix “users.”.
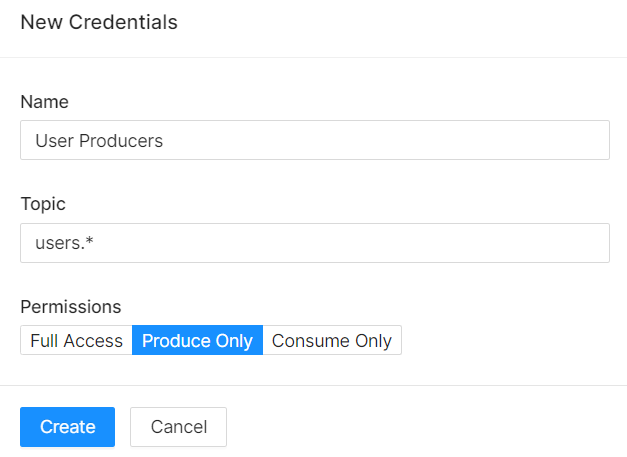
For more detailed information about credentials, please read docs.
Building React Native App
React Native is a framework, which allows developers to create native mobile apps for IOS and Android with JavaScript. Please follow the steps to create React Native environment and start building mobile apps.
This demo app contains only one screen. On this screen, there will be four images of four different items. When a user clicks on one of them, React Native will read its price from Upstash Redis, return to the user, and send the log of this operation to Upstash Kafka. If something unexpected happens, then app will produce the error event and send it to “users.error” topic on Kafka.
All the communication with both Redis and Kafka will be based on HTTP, and we will use REST API’s.
Now, we need to create our Upstash Redis database to store the prices. To do this, please check the docs. I will not go into further details on setting the Redis in this post.
Since we are demonstrating both success and failure cases, we will add three prices for the first three items from CLI. There will be no price for the last one.
The command is: SET "PRODUCT-CODE" "PRICE"
SET 1234 30
SET 1235 42
SET 1236 22
You can check the data from “Data Browser” tab.

The screen can be seen below.

We are going to use upstash-kafka library, which is provided by Upstash to communicate with our Kafka cluster via HTTP requests. This is a JavaScript library, and it can be used with React Native.
First, install the upstash-kafka library.
npm install @upstash/kafka
Then, we need to configure our Kafka client to use and create producer in “ComponentDidMount” function, which is the first function that is executed when a screen is created.
componentDidMount() {
	kafka = new Kafka({
		url: “<UPSTASH_KAFKA_REST_URL>”,
		username: "<UPSTASH-KAFKA-PRODUCEONLY-USERNAME",
		password: “UPSTASH-KAFKA-PRODUCEONLY-PASSWORD",
	});
	p = kafka.producer();
}componentDidMount() {
kafka = new Kafka({
url: “<UPSTASH_KAFKA_REST_URL>”,
username: "<UPSTASH-KAFKA-PRODUCEONLY-USERNAME",
password: “UPSTASH-KAFKA-PRODUCEONLY-PASSWORD",
});
p = kafka.producer();
}Now, our Kafka library is configured at the beginning of the application. Since our purpose is to make the mobile app producer, we will just use the following function in our case.
const res = await p.produce("<my.topic>", message);const res = await p.produce("<my.topic>", message);On this screen, when the user clicks on one of these images, we will send an HTTP request to get the price of it.
async costQuery(code){
	console.log("CODE OF QUERIED PRODUCT: ", code);
	await fetch('https://us1-maximum-boar-36431.upstash.io/get/' + code, {
		headers: {
		Authorization: "Bearer UPSTASH-REDIS-READONLY-TOKEN"
		}
	})
	.then(response => response.json())
	.then(async (data) => {
		var result = data["result"];
		if(result == null){
			throw new Error("Price of the " + code + " could not found.")
		}
		else{
			const res = await p.produce("users.purchase", "Cost of " + code + " is retreived successfully.");
			Alert.alert("The price of the product is " + result);
		}
	})
	.catch(async (err) => {
		const res = await p.produce("users.error", err.message);
	});
}
async costQuery(code){
console.log("CODE OF QUERIED PRODUCT: ", code);
await fetch('https://us1-maximum-boar-36431.upstash.io/get/' + code, {
headers: {
Authorization: "Bearer UPSTASH-REDIS-READONLY-TOKEN"
}
})
.then(response => response.json())
.then(async (data) => {
var result = data["result"];
if(result == null){
throw new Error("Price of the " + code + " could not found.")
}
else{
const res = await p.produce("users.purchase", "Cost of " + code + " is retreived successfully.");
Alert.alert("The price of the product is " + result);
}
})
.catch(async (err) => {
const res = await p.produce("users.error", err.message);
});
}If the query is successful, then the following code
const res = await p.produce(
  "users.purchase",
  "Cost of " + code + " is retreived successfully.",
);
const res = await p.produce(
"users.purchase",
"Cost of " + code + " is retreived successfully.",
);sends the log of the successful operation to Kafka and the alert will be like below.
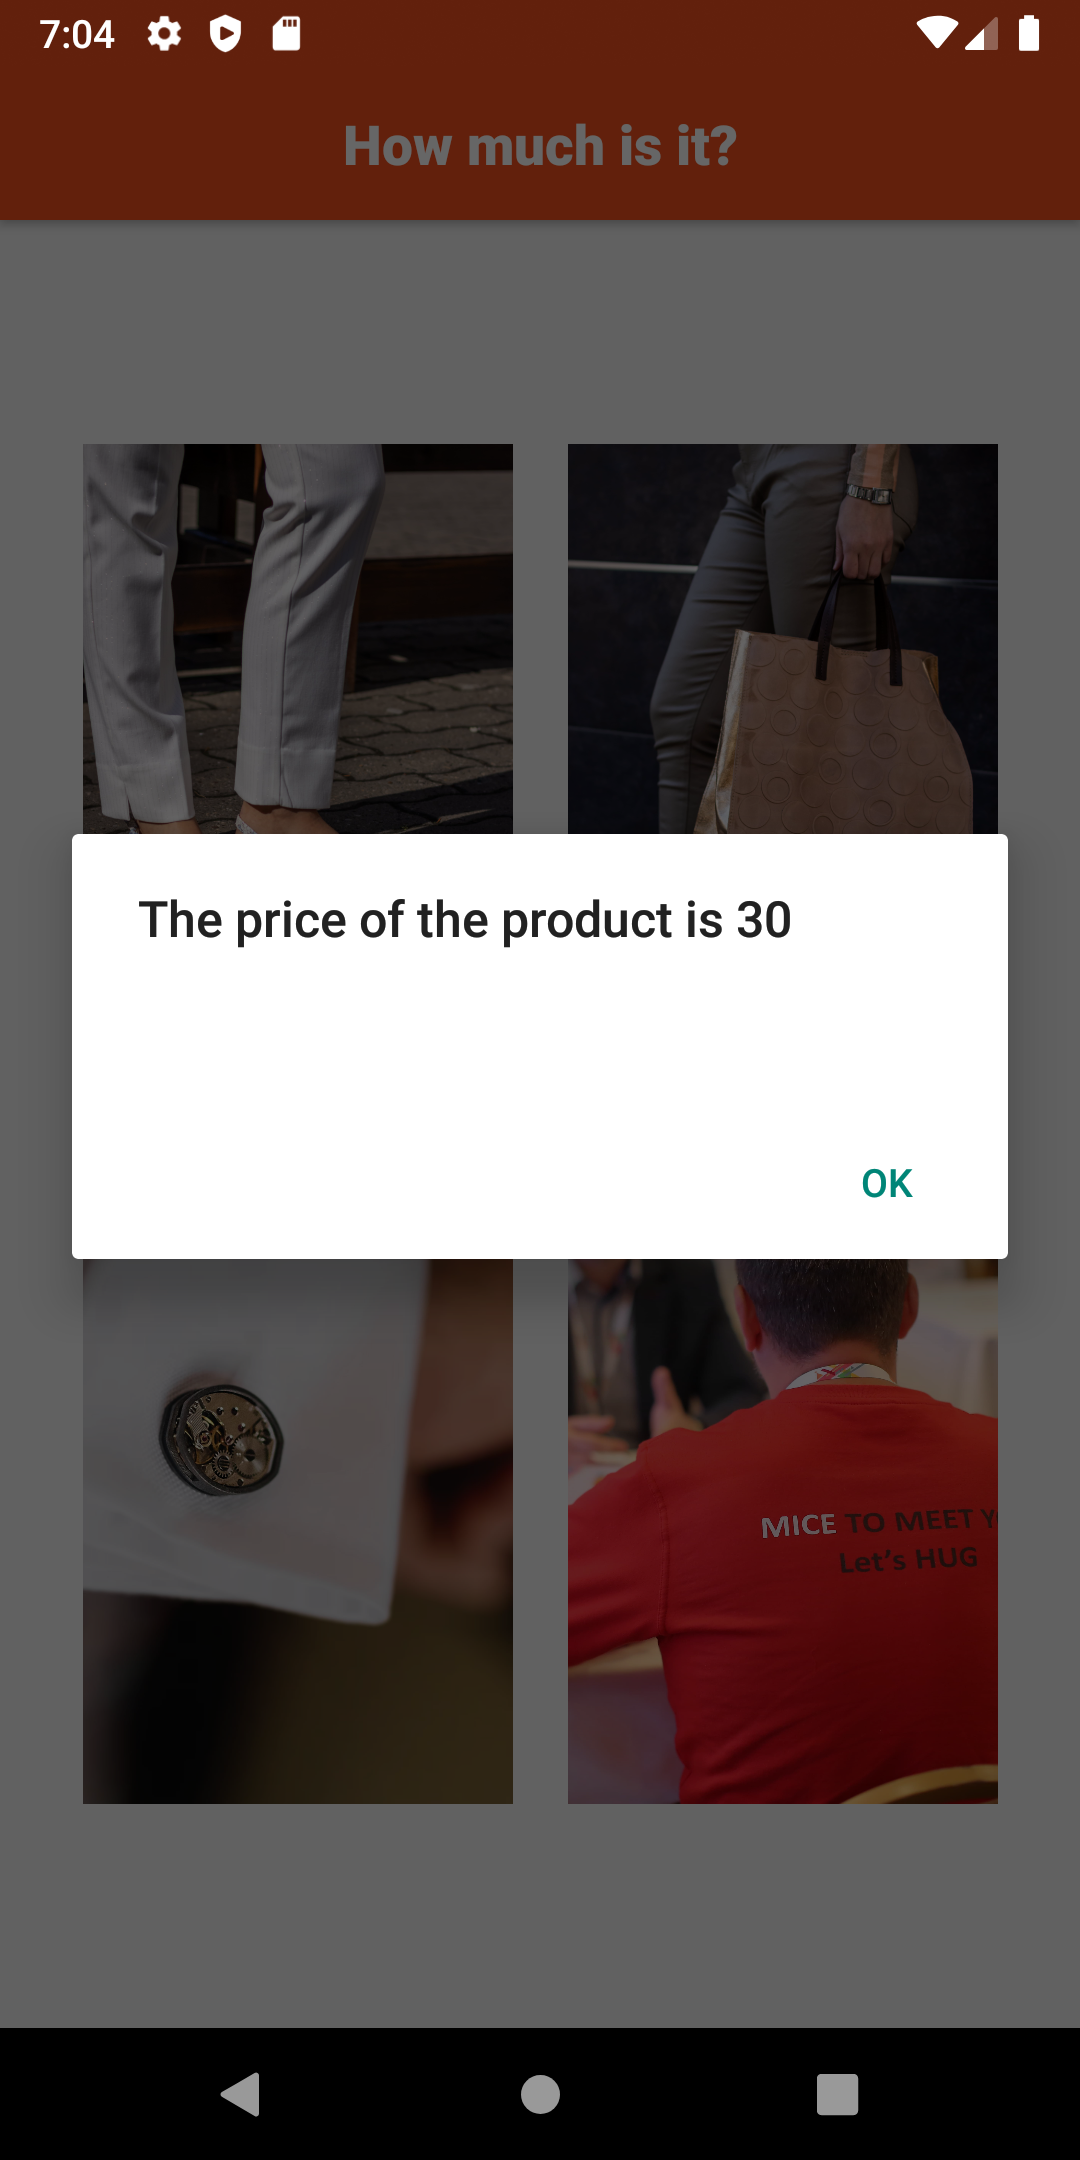
If the user clicks on the fourth image, which does not have the price, then error occurs, and the error message is sent to Kafka.
const res = await p.produce("users.error", err.message);const res = await p.produce("users.error", err.message);Complete source code of the application is available at react-native-collecting-logs.
Conclusion
In this post, we developed a mobile application by using React Native, collected and sent the logs&errors to Upstash Kafka by using the upstash-kafka upstash-kafka library, which uses HTTP requests and used Upstash Redis to store some information related to app.
I hope this post helps you to build new products easily with Upstash Kafka & Redis.
